YuJa Instructor Quick Steps Guide
Create a Tool Link in Blackboard for YuJa Recordings
You can create a Tool Link (course menu) that will go directly to YuJa recordings by following these steps:
- Choose the Add Menu Item icon and Select Tool Link.
- Name the tool link Tools, check Available to Users, and Tools Area as the tool type.

YuJa Software Station
The first time you log into YuJa, you will be prompted to download YuJa Software Station. Follow the prompts to install. Once installed, clicking the tool link in Blackboard brings you to the YuJa Dashboard located at YuJa.com. This is where you create, organize, and manage recordings.
YuJa Dashboard

Create a YuJa Recording
When you click Create Recording, you will launch the YuJa Software Station.

About the YuJa Software Station
-
Title: Before you start recording, indicate the recording’s title. Consider using a naming convention such as COURSE NAME | UNIT | LECTURE TOPIC or something similar that will make it easy to sort and find your recordings later. You can rename your recordings too.
-
Description: Indicate what your recording is about. This can include a brief description or objectives. You can edit the description later.
-
My Media Collection/Default Collection and Media Channel Selection:
- By default, your recording will be stored in the default media collection folder. You can create folders (see figure 1, select My Media, choose New Folder) to organize your recordings.
- Click the Media Channel button to select a course to publish your video.
-
Video Source: This displays the video currently feeding into the recording. See #6 for more information.
-
Screen: This displays the current screen being recorded.
-
Video: This button provides for alternative video options, or to turn video off completely.
-
Audio: This button provides for alternative audio input options.
-
Screen: This button provides for alternative content display options. For example, you can choose from single or duo displays, custom display, or capture a selected area.
Click Start to begin recording
Stopping or Pausing the Recording
Look for the YuJa Software Caption controls located in the lower right corner or your computer screen. You can pause or stop recording.

If you stopped the recording, you’ll see the option to Delete or Save:

Publish Recordings
If you do not specify a location to place a recording beforehand, it will be located in the Default Collection folder inside My Media. You can create new folders using the New Folder option shown in figure 3 to organize your recordings.
To make a recording available to your class you must publish it to the class channel. You can do this in one of two ways:
- Hover over the thumbnail of the recording and choose Publish
- Then select your course beneath the All Channels list:
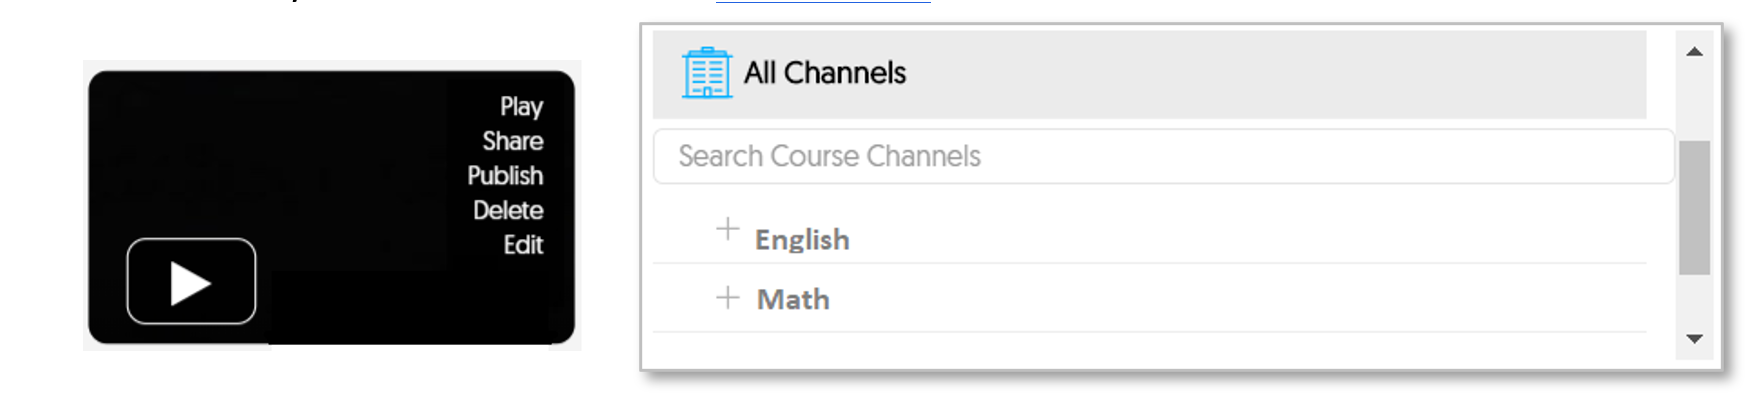
- Choose Select when finished.
Here’s another way you can publish your recording…

Additional Notes
When making a YuJa recording, you will receive an email confirmed once your recording has rendered. You will also receive an email notification when the captioning has rendered.
YuJa comes with a captioning program and automatically provides closed captions with each recording, however no closed captioning system is perfect, and you’ll need to make edits. To view and edit the closed captioning transcript, hover over the video thumbnail and choose Edit:

The Video Editor displays. Look for this toolbar and click the “CC” button:

This displays the Captions editor:

You can make edits to the captioned script directly in the Captions editor as well as add captions.
Choose the Index button located to the right of the CC button to view a video thumbnail and timestamp alongside the corresponding caption. You’ll also have the option to select either normal or bolded text, and you can single or double indent.
Remember to Save changes.
Additional YuJa Help Resources
This handout is designed to get you started with recording YuJa videos. There’s a lot more to learn. Check these resources for more information.
YuJa Support Site
YuJa Video Tutorials
YuJa YouTube Channel
Have additional questions or technical issues?
Don't hesitate to contact VCSU Service Desk by sending a chat or creating a ticket here: https://onestop.vcsu.edu/support/tickets/new
Or send us an email at tsticket@vcsu.edu.