Creating a rule in Outlook Web Access
Here is how to create a rule in Outlook Web Access:
1. Log into https://email.vcsu.edu with your NDUS credentials (you MUST use "@ndus.edu" following your username).
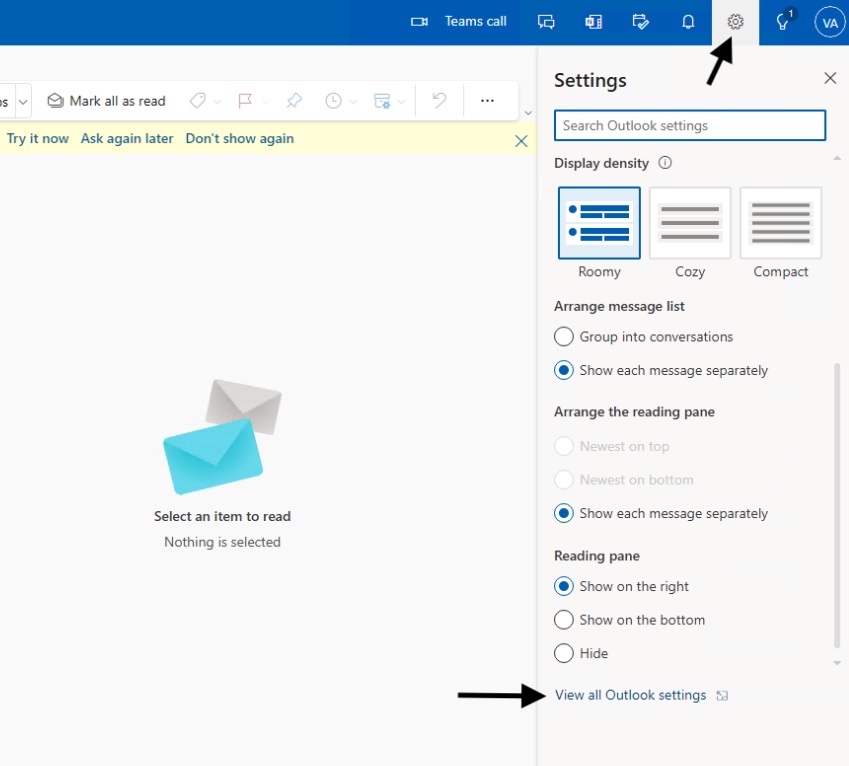
2. Click the gear icon in the upper right corner of the page to open Settings as shown below, then select "View all Outlook settings" at the bottom.
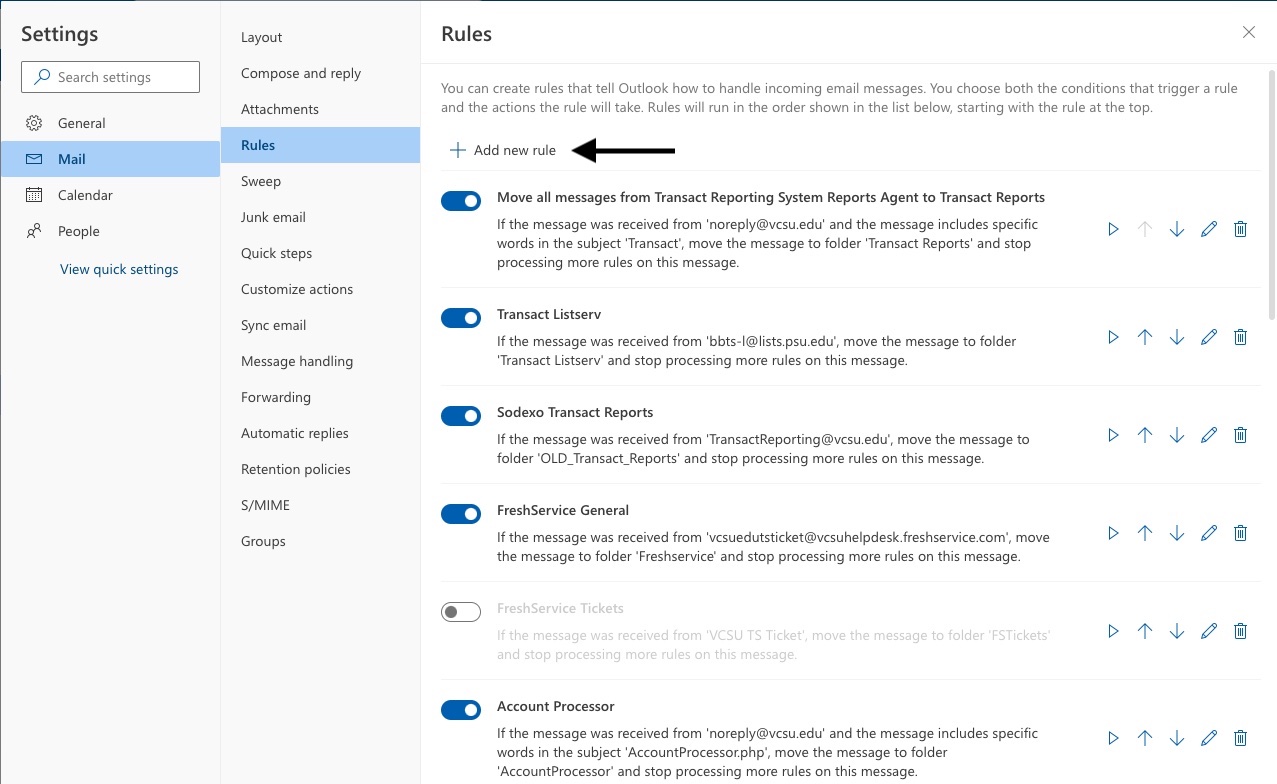
3. Make sure "Mail" is selected in the left pane, then select "Rules" from the middle pane as shown below, then click "Add new rule" (next to the "+" sign at the top).
Note: refer to the screenshot below for the remaining steps:
4. Give the new rule a name where it says "Enter a name". For example if you are creating a rule to delete all email from "gmail.com", you could name it "Delete Incoming Emails from Gmail".
5. Under "Add a Condition", click the dropdown arrow and select "Sender Address Includes" and enter "@gmail.com".
6. Under "Add an action" click the dropdown arrow and select "Delete".
7. Click the "Save" button at the bottom, and this will save the rule and put it into effect.
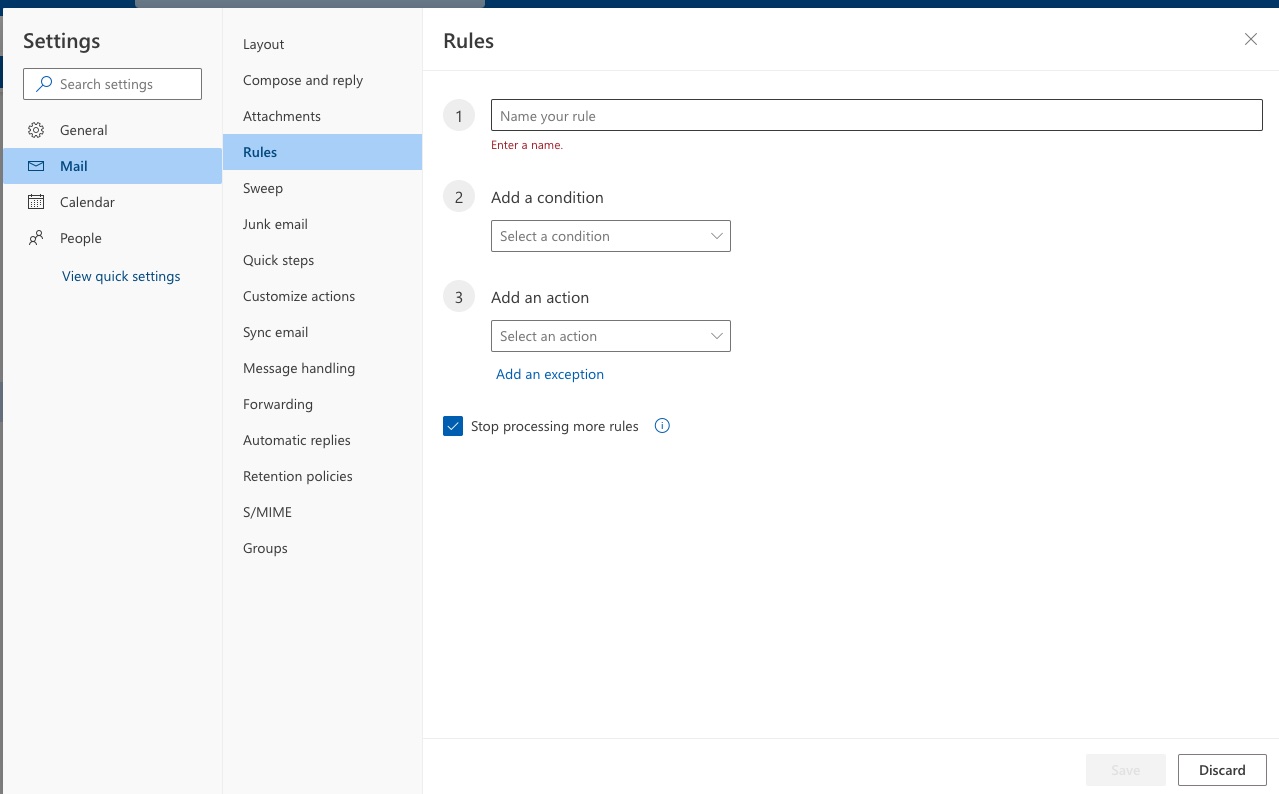
Note: There are several options you can select for "Add a condition" and "Add an Action" depending on what you want to do. For example, rather than deleting incoming emails, you could create a folder and then have the emails moved into the folder.