Connecting to new Classroom Audio - Mac
**New in 2021**
All Classrooms Teaching Stations have been gutted and have been upgraded with all new AV equipment. One of those components is the new QSC DSP and Amplifier. The following steps below will assist you in connecting to the system and verifying that your laptop is set up properly. This system should automatically set these devices as your sources once your computer is fully connected to the system, but it is good practice to check every now and then. This does take around 8-15 seconds.
Teaching Stations can now also charge your laptop and connect to the LAN network. This is all done with one single cable.
*Note - that wired network connections are not available in Rho-305, Lib-108, Well-256 with media carts
1. Connect your MacBook with the green-tagged USB-C cable. For older MacBook's click here.
*Note - It will take around 8-15 seconds for everything to be ready on your laptop after connecting. (Projection, sound, network, camera)
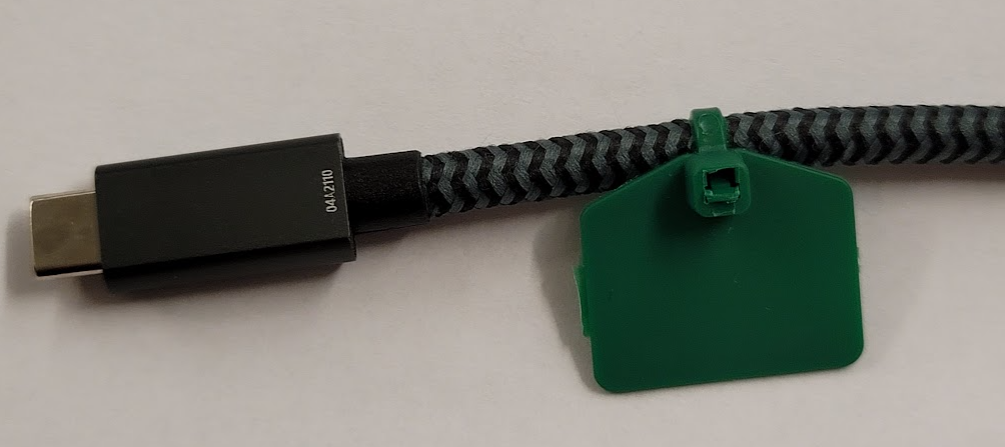 2. Your laptop should default to (Classroom #) for input (microphone) and output (speakers). You can verify/change the sound settings by:
- Click on the Apple
- Select System Preferences..
- Select Sound
- In the Output and Input tabs you can change the device to (Classroom #)
- Click on Show volume in menu bar for future use.
*Note - There is a ticket/request to the vendor to change these names. In the future, the microphones could be relabeled as Echo Cancelling Microphones or Classroom Microphones, or TBD.
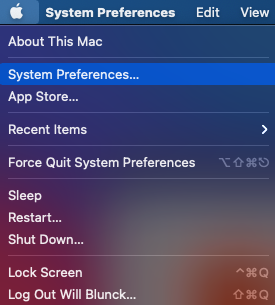
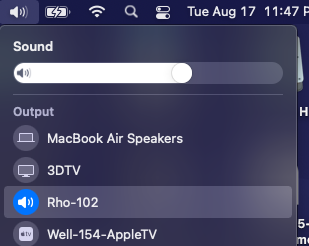
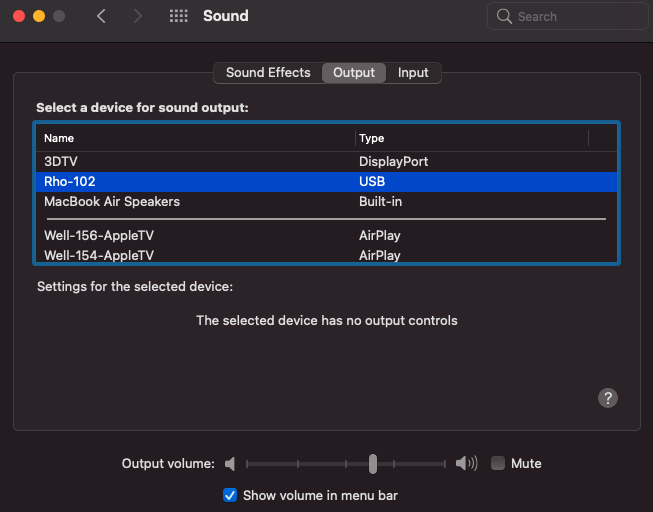 3. You can verify/change your laptop's sound settings by clicking on the speaker icon on the upper right-hand of the menu bar.
You can also search for Sound in the magnifying glass in the upper right-hand corner of the menu bar.
Using Microphones in Teams
Teams should automatically default to Echo Cancelling Speakerphone for both microphone and speakers. Verify connection to sound system in Teams by one of the following examples below:
Example #1 - Global Settings
1. Click on the ellipsis in the right-hand corner and select Settings.
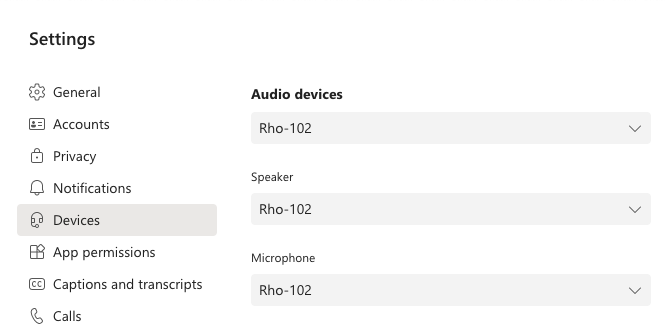
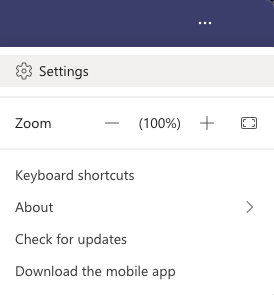 2. Select Devices in the left column and verify/change the settings for Echo Cancelling Speakerphone (Classroom #) is selected for both speakers and microphone.
*Note - You can still use your SmartMike+ Bluetooth Microphone. Just make sure it's on, connected, and select SmartMike+ as the Microphone.
Example #2 - Join Meeting Screen
1. When you are joining or starting a meeting you can verify/change sound settings by clicking on the slider icon.
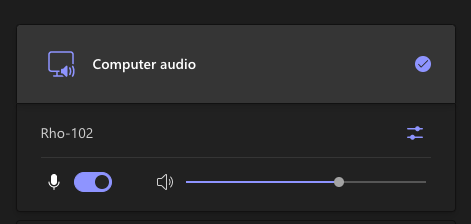 2. This will bring up the device settings. You can verify/change your speaker and microphone settings here.
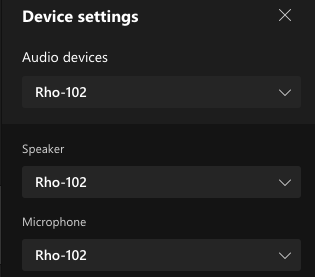 3. Click on the X when you are done and click on Join Now to start the meeting in Teams.

Example #3 - Change in the Meeting
1. Click on the ellipsis in the meeting menu bar and select Device Settings.
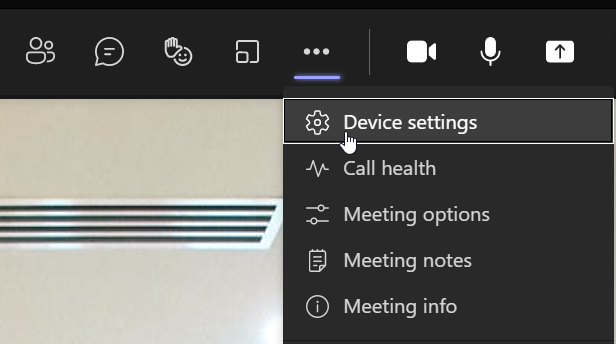 2. This will bring up the device settings. You can verify/test/change your speaker and microphone settings here as well as select connected Cameras on the fly.
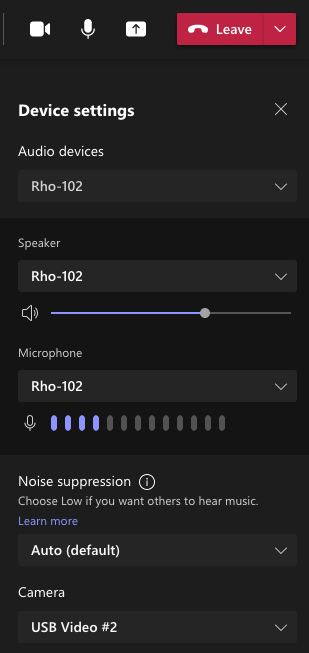 3. Click on the X when you are done and continue with your meeting.
If the room's AV system is not showing the ECS (Echo Cancelling Speakerphone) on your machine or you have no projection, please verify that the USB-C docking station is turned on by:
1.Opening up the cabinet's front door make sure the Docking Station on the shelf is turned on. This is the device in the left-hand corner.
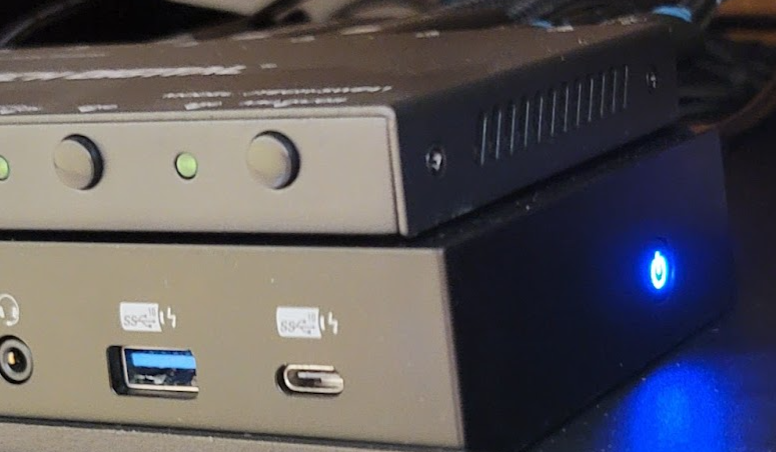
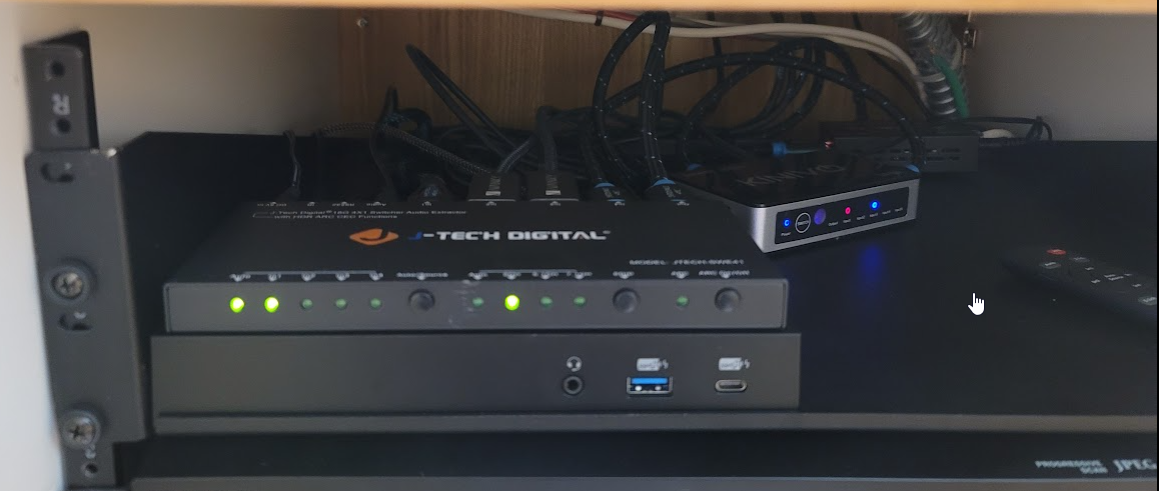 2. There should be a blue light lit on the docking station's right side. That is its power button. If there is no light, press the docking station's power button and please waiting the docking station has fully booted up.
For additional help contact the Technology Service Desk @ 701-845-7340